Create a React Native App for VisionOS (device not needed)
Feb 19, 2024 - 4 min read

(It's now possible to run React Native apps on visionOS without using the somewhat limited XCode compatibility mode, which was the prior leading solution. This mini-blog quickly describes how to create your first pure React Native app for visionOS which can utilize the full platform.)
Jump to Section:
- Overview
- Requirements
- Download XCode, Tools, and Simulator
- Create New Project
- Install Pods
- Run Simulator
Overview
React Native has been unleashed on Apple Vision Pro, presenting developers with the platform's complete capabilities. In contrast to compatibility mode, this method enables immersive experiences and XR functionalities on visionOS.
This should encourage more developers to craft spatial applications using the React Native platform and community they are already familiar with. Below we quickly describe how to create your first React Native spatial app targeted for visionOS.
Requirements
- Xcode 15.2+
- visionOS Simulator run-time
- CMake 3.28.0+
- Ruby 2.6.10+
Apple Vision Pro is not required, you can run the visionOS simulator.
Download XCode, Tools, and Simulator
You will need Xcode v15.2+ installed on your development machine if you do not have it already, along with the Apple developer command line tools and the Apple Pro visionOS Simulator.
To download XCode there are two ways:
- Download from the App Store on your mac.
- Download from the Apple developer website (let's you specify a specific version).
To download the Apple developer command line tools installed, if you just installed XCode for the first time you may be able to download/update the command line tools by typing the following command in a terminal:
xcode-select --install
However if you receive an error then you can also download the tools from the Apple developer website.
Lastly, you'll need to download the Vision Pro simulator, to install:
- In Xcode, from the menu bar, choose Xcode > Settings….
- Go to the Platforms tab.
- Click the Add button (+) in the lower left corner, and then select a platform to view a list of its available versions.
Select the Apple Vision Pro visionOS simulator and click Download & Install.
Create New Project
Now you're ready to create your first React Native app targeted for visionOS. From a terminal run the following command:
npx @callstack/react-native-visionos@latest init MySpatialApp
This will create a folder named /MySpatialApp in your current directory which has numerous files and folders inside it. Start by changing directory into the root project folder:
cd MySpatialApp
After switching into the directory you may see messages like:
RVM used your Gemfile for selecting Ruby, it is all fine - Heroku does that too,
you can ignore these warnings with 'rvm rvmrc warning ignore /Users/user/dev/MySpatialApp/Gemfile'.
To ignore the warning for all files run 'rvm rvmrc warning ignore allGemfiles'.

Unknown ruby interpreter version (do not know how to handle): >=2.6.10.
You should still be able to proceed with these warnings, however if you want to eliminate the latter warning you can edit the local Gemfile and change the line:
ruby ">= 2.6.10"
to...
ruby "2.6.10"
If you have a later version of Ruby installed or want to set to a specific version you can update the file to ruby "3.3.0", for instance.
Install Pods
Next we want to install the cocoapods needed to run our visionOS app, making sure to run from the /visionos sub-directory:
cd visionos
bundle update
bundle install && bundle exec pod install
If successful you should see output similar to:
...
Pod install took 23 [s] to run
Integrating client project

[!] Please close any current Xcode sessions and use `MySpatialApp.xcworkspace` for this project from now on.
Pod installation complete! There are 55 dependencies from the Podfile and 53 total pods installed.

[!] hermes-engine has added 2 script phases. Please inspect before executing a build. See `https://guides.cocoapods.org/syntax/podspec.html#script_phases` for more information.
You are now ready to run your project in XCode.
Run Simulator
From the visionos folder, double-click the workspace file named MySpatialApp.xcworkspace to open in XCode:

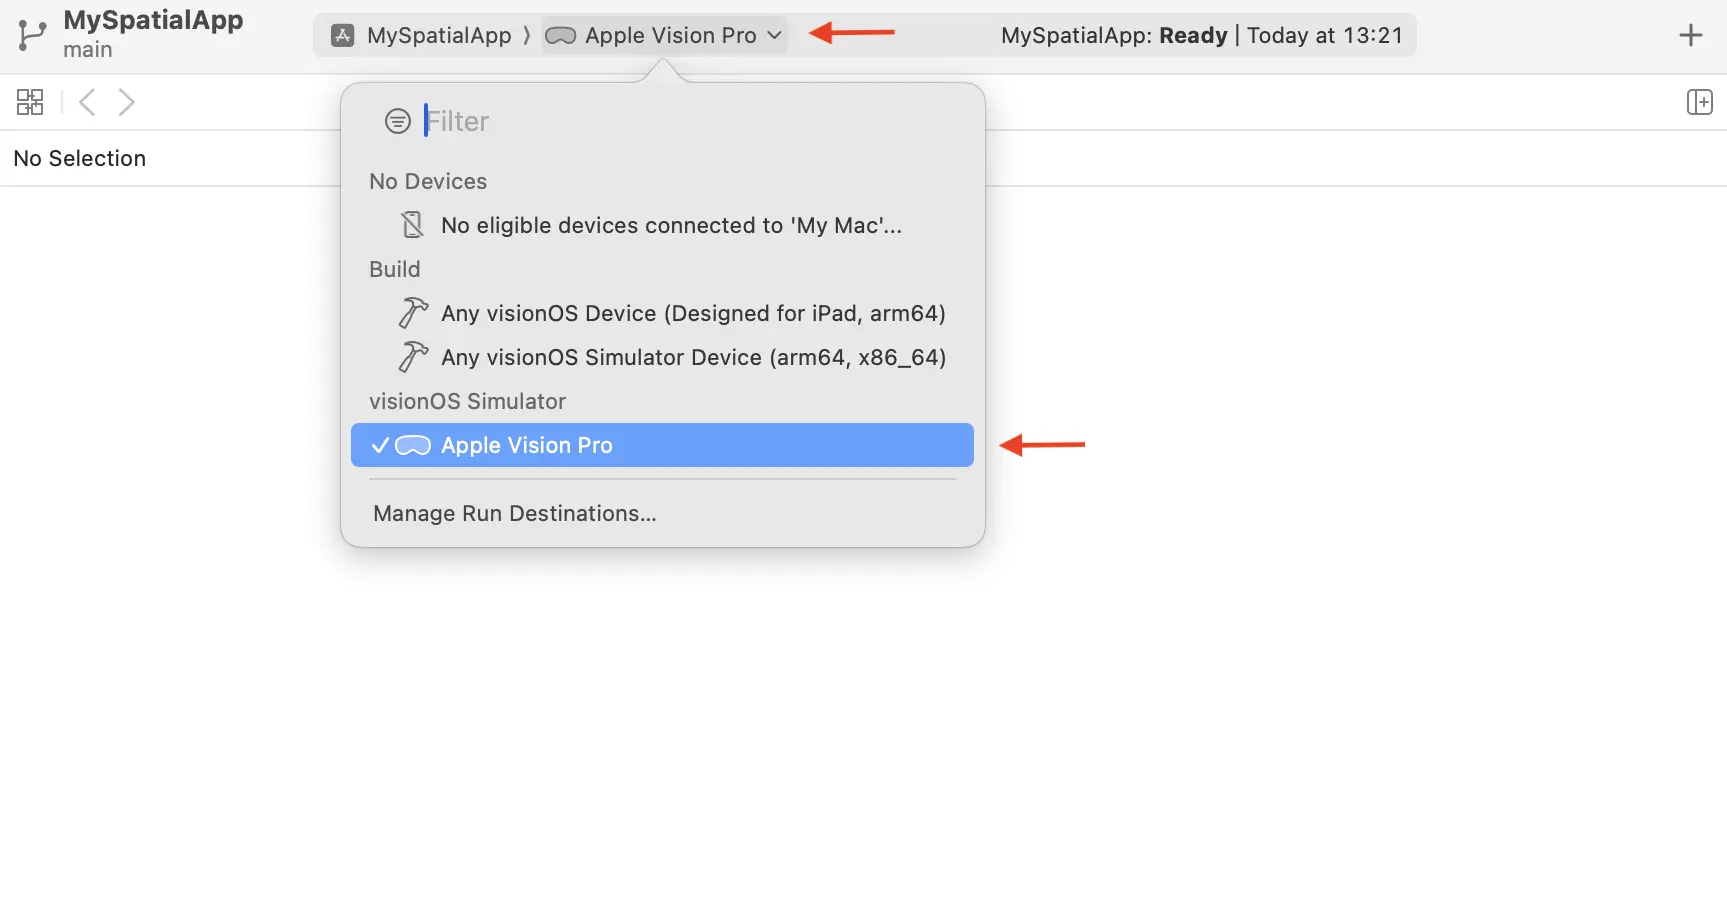
From XCode, select the Project -> Simulator drop down at the top of the screen and make sure the Apple Vision Pro simulator is selected.
Build and run the project by clicking the [Play] button near the top left, if all goes well you should now you have your first React Native spatial app running in the Apple Pro Simulator:
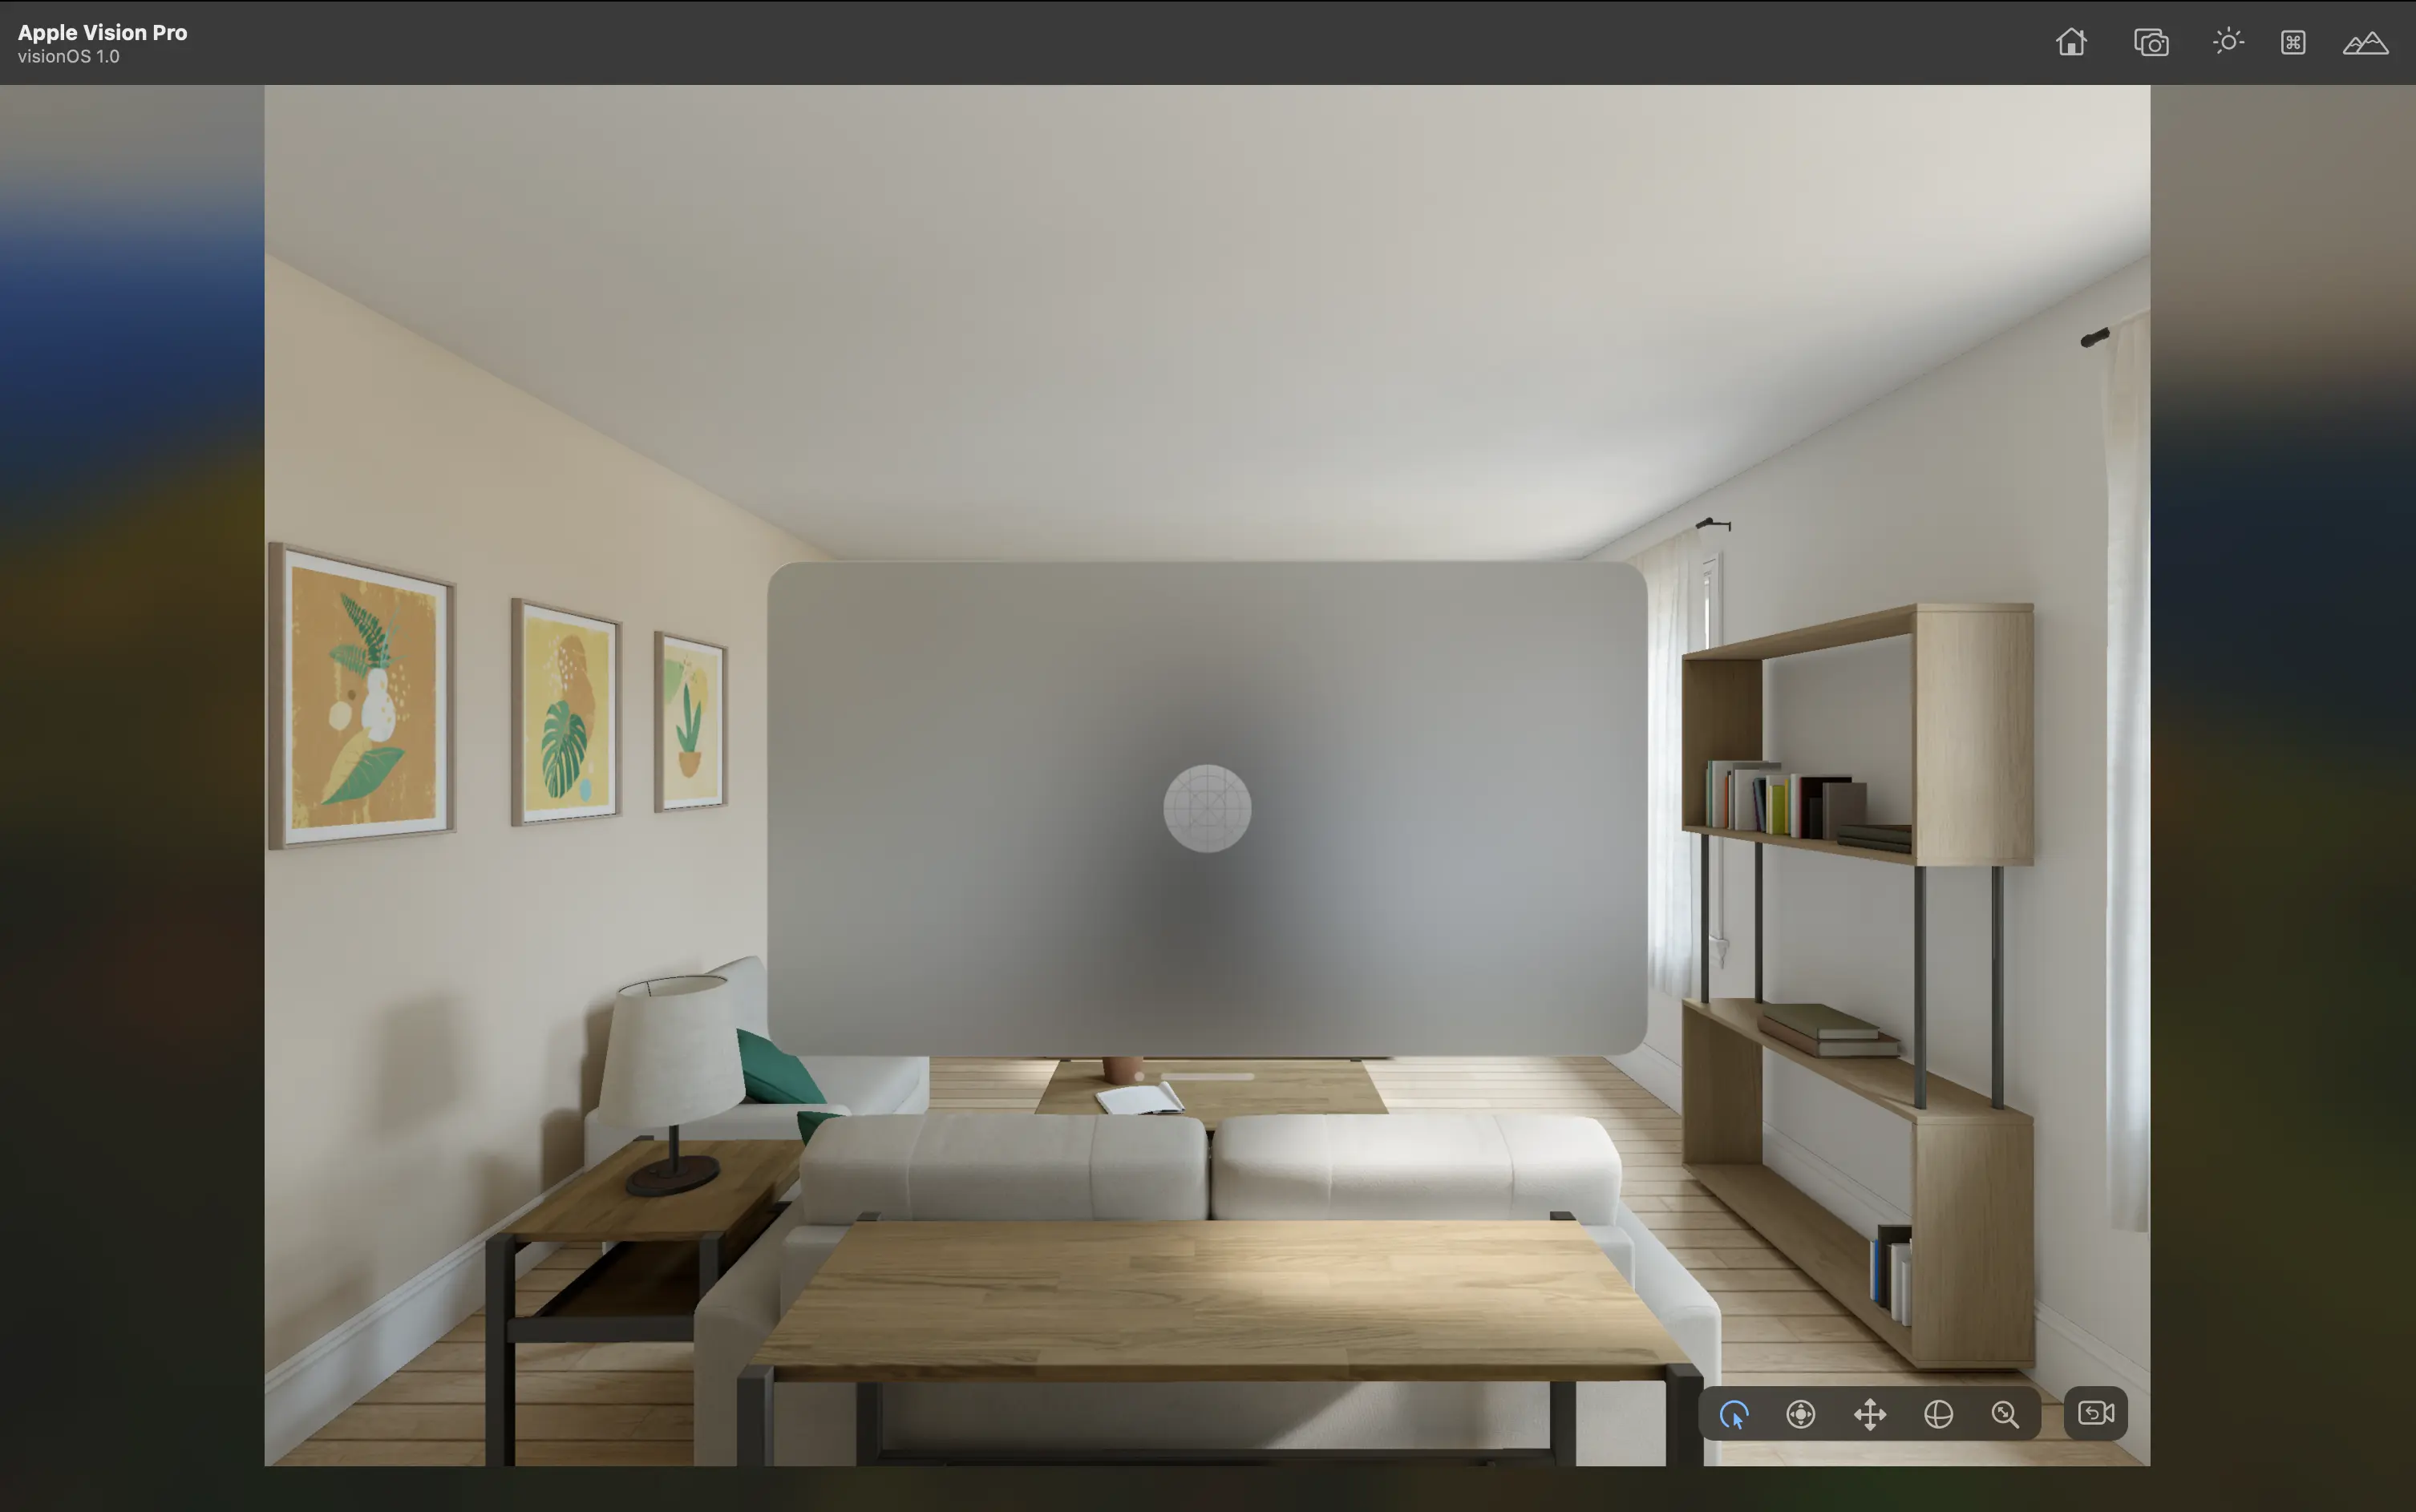
Use your mouse in combination with the UI controls in the bottom right to move around in 3D, zoom in and out, and see the sample React Native components:

Hope this has been helpful, happy coding!
References
- https://www.callstack.com/blog/announcing-react-native-for-apple-vision-pro
- https://developer.apple.com/visionos
Thanks for reading!